WSAPPX is a windows process used to install, uninstall, and update Microsoft store apps. It’s a process that runs in the background of Windows 8, 10 operating system as a part of the Microsoft store and universal app platform. When you are installing, uninstalling, or updating any apps through the Microsoft store, you may find this process is consuming high disk usage. This might also cause 100% CPU usage issue as well.
How To Fix WSAPPX High Disk Usage Issue
Follow these below steps to troubleshoot or fix this WSAPPX High Disk Usage issue on your Windows 10 or Windows 7 Computer.
1. Disable Windows Store
You can easily disable the Windows Store by using the Group Policy editor.
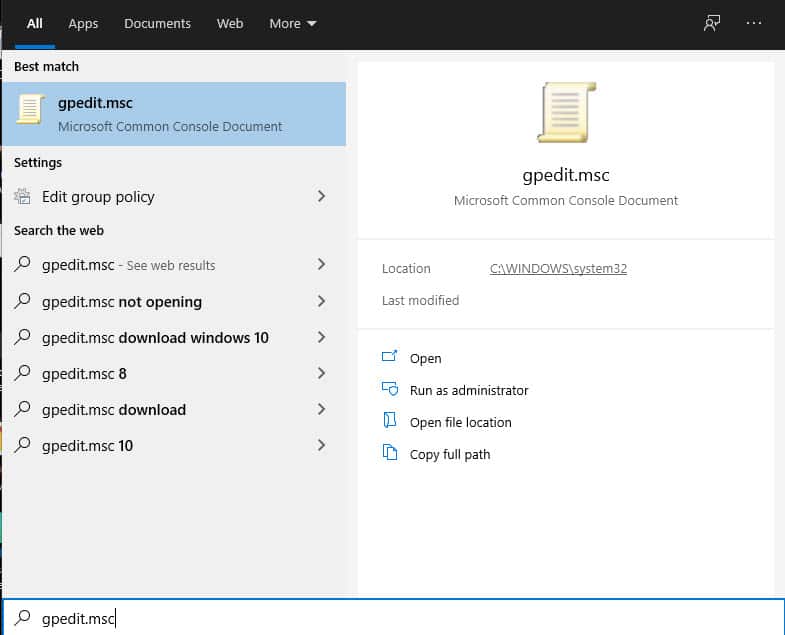
Step 1: Right click on the start menu and type gpedit.msc and hit enter.
The group policy editor will open.
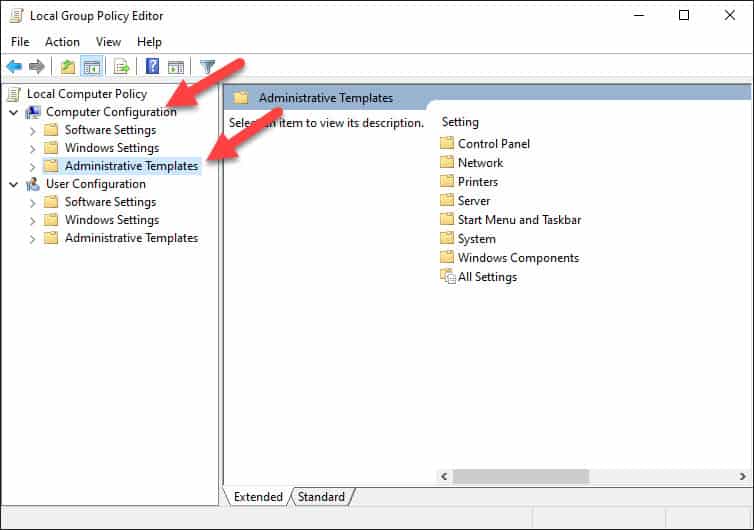
Step 2: Now navigate to the Computer configuration and select the Administrative Templates
Step 3: Now go to the windows components, and select Store.
Step 4: Now Find “Turn of the Store Application” and click on it. You will get an option for edit policy setting.
Step 5: Now click on the edit policy setting and pop-up window will be open.
Step 6: Now change the settings “Not Configured” to “Enable” and click on apply and click.
That’s it.
2. Increase Virtual Memory
You can fix this issue by expanding the virtual memory of the windows system. Follow these steps to expand the virtual memory of your system.
Step 1: Click on the start menu and type Performance in the search bar, then select the Adjust the appearance and performance of windows settings.

Step 2: Now select the advanced tab in the top and click on the change button in the virtual memory section.
Step 3: Now Uncheck the checkbox of “Automatically manage paging file size for all drives,” setting.
Step 4: Now Select the drive where the Windows is installed and click on ‘Custom size’.
Step 5: Enter the size of your ram memory in the “initial size” box in MB and enter the double of the value you have entered initial size at Maximum Size box.
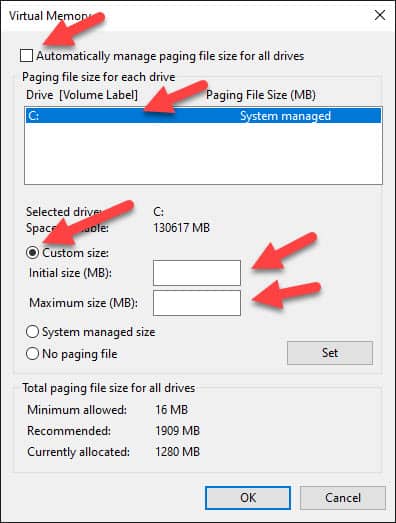
Step 6: Now click on the Set Button and then click on the OK button. Then Restart your windows device for the changes to take effect. Now your Virtual Memory will be increased.
That’s it, the WSAPPX High Disk Usage issue will be fixed. Hope you liked our tutorial. Do share it with your friends on social media.
I hope you were able to fix WSAPPX High Disk Usage Issue or 100% CPU usage issue with our tutorial.