If you have a small amount of physical RAM in your computer, you can use the Virtual Memory to create additional memory when the RAM fills up. So let’s learn how to increase virtual memory.
How To Increase Virtual Memory in Windows 10
Follow the below steps one by one.
Step 1: Open the Windows 10 search bar type Settings and open the settings app.
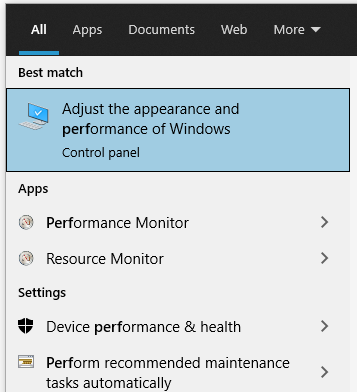
Step 2: Now search for Appearance and performance option and open it. Or search for it directly on the Windows search bar and open it.
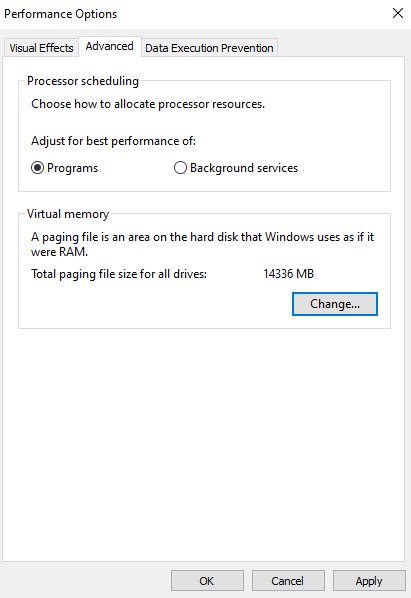
Step 3: Now click on the Advanced tab at the top of the window next to Visual effects tab. Now you will see a Change button below the Virtual Memory option. Click on it.
Step 4: Now you will have taken to virtual memory settings where you can change the memory for the drives.
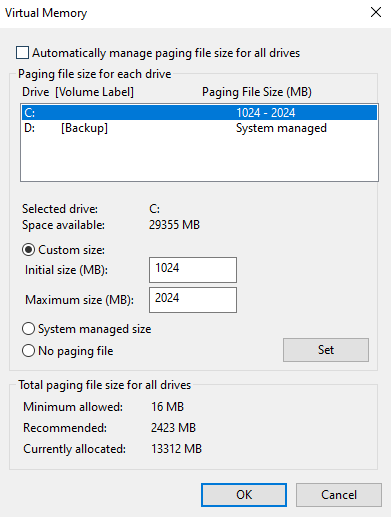
Step 5: Click on the drive. Here i have selected the C drive which is an SSD and set the initial size and maximum size for the virtual memory. Make sure you don’t use all the free space in that specific drive.
Step 6: Click on the Set button when you are done. And then click on OK button to apply the settings.
Step 7: Now restart your windows 10 computer and your Virtual memory will be increased and when your RAM becomes full this virtual memory will be used.
That’s it, you have sucessfully changed the Virtual memory. Do let us know if you are facing any issues while increasing virtual memory on your Windows computer.
TIP: If you are facing System related issues on Windows like registry errors or System files being deleted by virus or System crashes like us, we recommend downloading Restoro software which scans your Windows PC for any issues and fixes them within a few steps.