
After the Windows 10 April 2018 Update, Microsoft has disabled the Microsoft Windows XPS Viewer App by default. The Windows XPS Viewer App enables you to view, edit, or sign on XPS documents on your Windows machine.
Let’s learn how to download and install the Microsoft XPS Viewer on your Windows 10 computer.
How to Download Microsoft XPS Viewer?
Microsoft XPS Viewer comes built into Windows 10 operating system so you don’t need to download the XPS viewer or installer. You have to enable it on the settings app. Let’s learn how.
How to install or Enable Microsoft XPS Viewer in Windows 10 & Windows 12
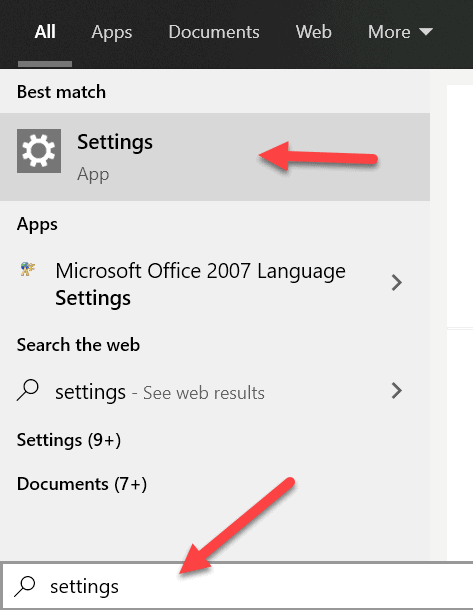
Step 1: Open the Windows Settings application by using the Windows 10 search option as shown in the screenshot below.

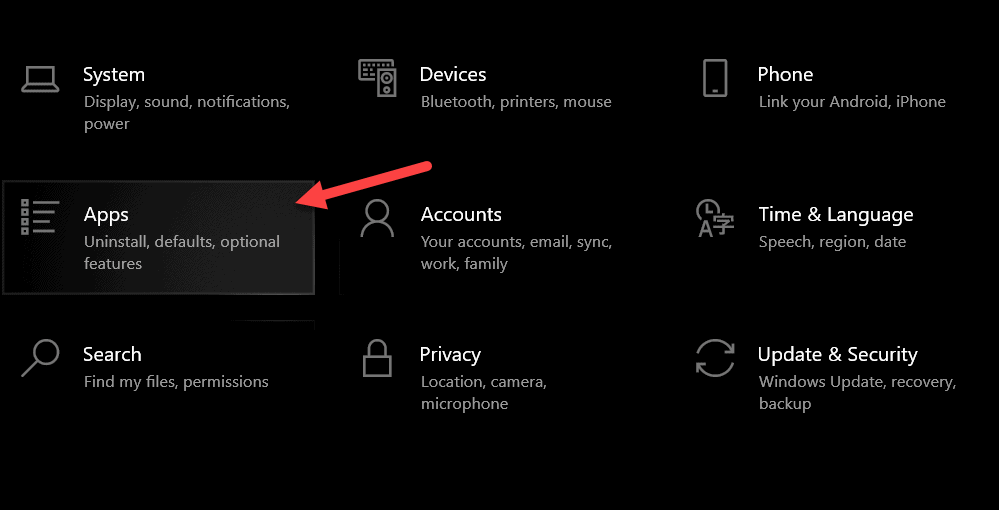
Step 2: After opening the settings app choose the Apps settings option.

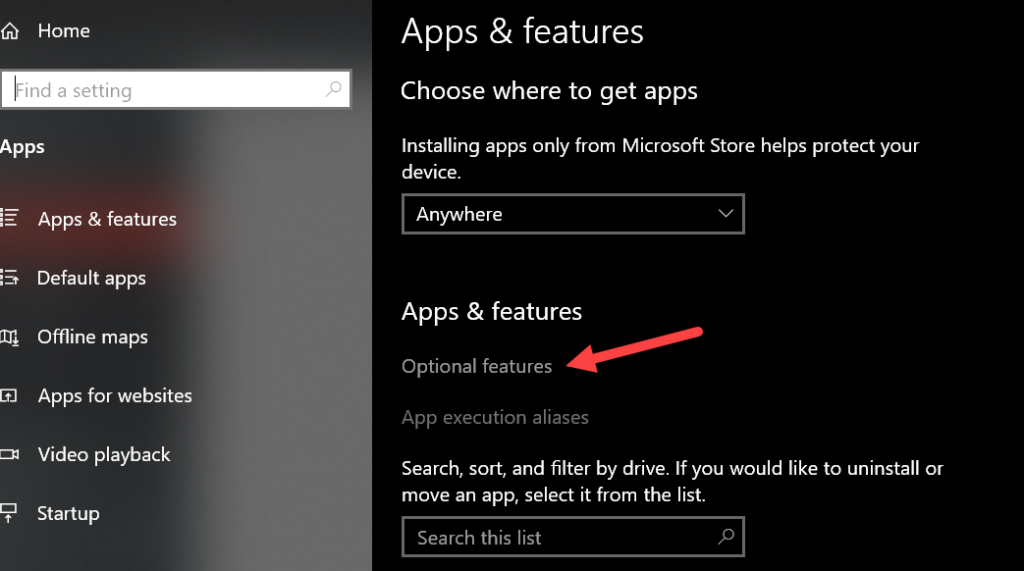
Step 3: Then Under the Apps & Features click on the Optional features option.

Step 4: Then click on the “Add a feature button”


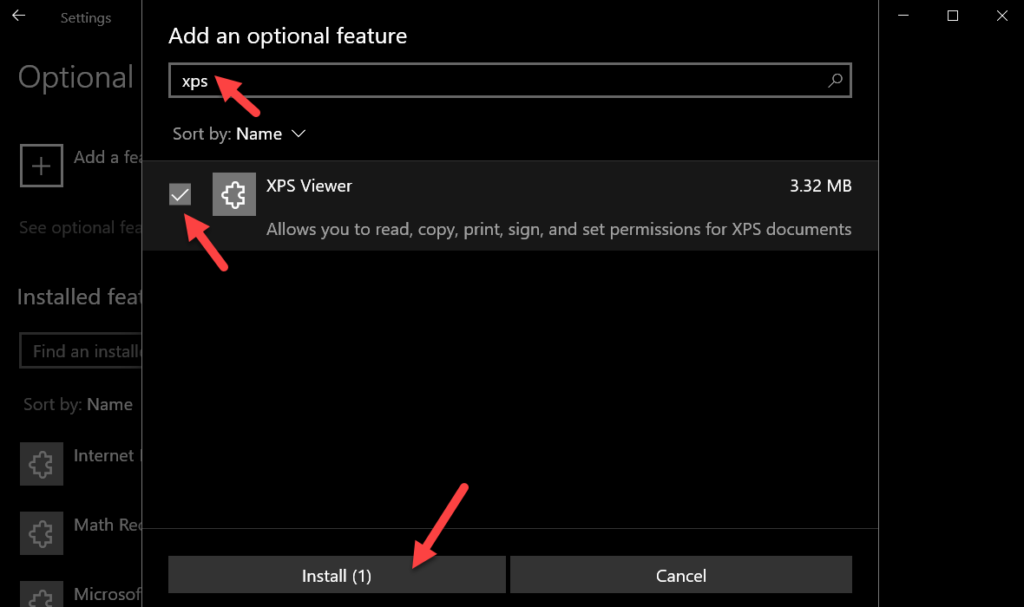
Step 5: And search for XPS in the search box as shown in the screenshot below.

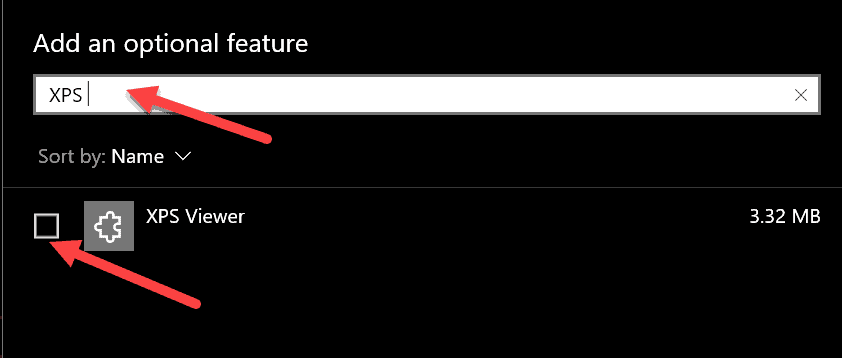
Step 6: Then Click on the Checkbox before the XPS viewer to enable it and click on the install button. This will start installing the XPS viewer features on your windows pc.

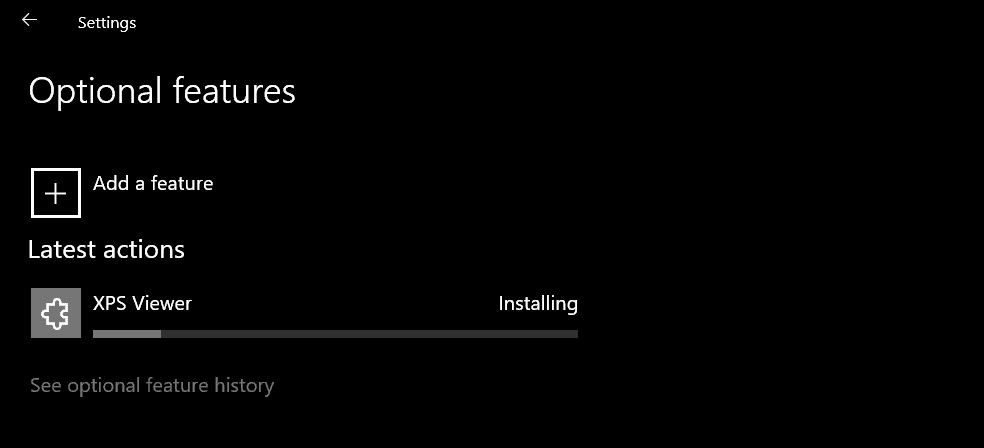
Step 7: Windows will start Installing the XPS Viewer. After some time the XPS Viewer app will be installed and you will be able to view and edit XPS documents.

Hope you were able to install the XPS Viewer on your PC and use it to edit and view XPS files which were disabled before.
WINDOWS PRO TIP: If you are facing System related issues on Windows like registry errors or System files being deleted by virus or System crashes like us, we recommend downloading Restoro software which scans your Windows PC for any issues and fixes them within a few minutes.

