
When you are using a MacBook at 100% battery in a docked setup, your battery will degrade sooner even though you are not using it. So we can use a software to control the maximum charge rate to 60% beyond which it won’t charge when you are using in a desktop type setup.
KEY TAKEAWAYS:
- It is beneficial to limit the battery charging on a MacBook to preserve its lifespan
- There are a few ways to do this, including using the AlDente app, BatteryStatusShow app, or enabling the “Optimized Battery Charging” feature on newer MacBooks.Steps are provided for each of these methods
- Limiting the charging of a MacBook can help to extend the battery’s lifespan and improve its overall health
Why to limit battery charging on your MacBook?
Limiting your charging on your MacBook to 60% will help save your battery life. As continuous charging to 100% will make the battery cycles higher thereby reducing the battery health. So even if you use your MacBook with an external monitor in a desktop setup while being charged the charge won’t be always 100% it will stop at the set limit of 60% or 80% and then MacBook will switch to power source from charging cable.
How To Limit MacBook Charging to protect Battery Health
Let’s learn How to set up maximum battery charge limit in MacBook to save battery life and cycles. You can check your battery cycles using the Coconut battery app from the mac app store here.
There are many ways to limit battery charging on a mac beyond a certain percentage. Use the one which you like the most.
1. Limit MacBook Charging Using AlDente
Step 1: Download the AlDente App from this link.
Step 2: After you have downloaded it, open the dmg file and drag the app to the applications folder on your mac.
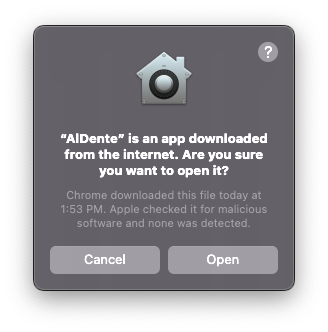
Step 3: Now open the Aldente app from the applications folder or launchpad and click on Open button when the warning message “Are you sure you wanted to open” appears.

Step 4: Now it will show a prompt to install a helper tool to control the max charge rate on your macbook. Click on the OK button to install it.
Step 5: Now enter your macbook password and click on Install Helper button option.
Step 6: In the settings icon on the Aldente app enable the options you wanted to show in the menu bar.
Step 7: Now Aldente will appear on the top menu bar as an icon as shown in the screenshots. Click on it to setup the percentage of battery charge limit. Here i have setup the battery charge limit at 60%.


Step 8: That’s it now the battery won’t charge above 60%.
2. Limit Battery charge Using BatteryStatusShow App
Step 1: Download the BatteryStatusShow application by going to this Github url and clicking on the Code button and choose the download Zip option button.


Step 2: Now extract the zip package and here you will find the BatteryStatusShow mac app version inside the Release folder.
Step 3: Click on the latest version of the app and Double click to launch the app.
Step 4: Now setup the max charge rate of your MacBook battery in percentage.

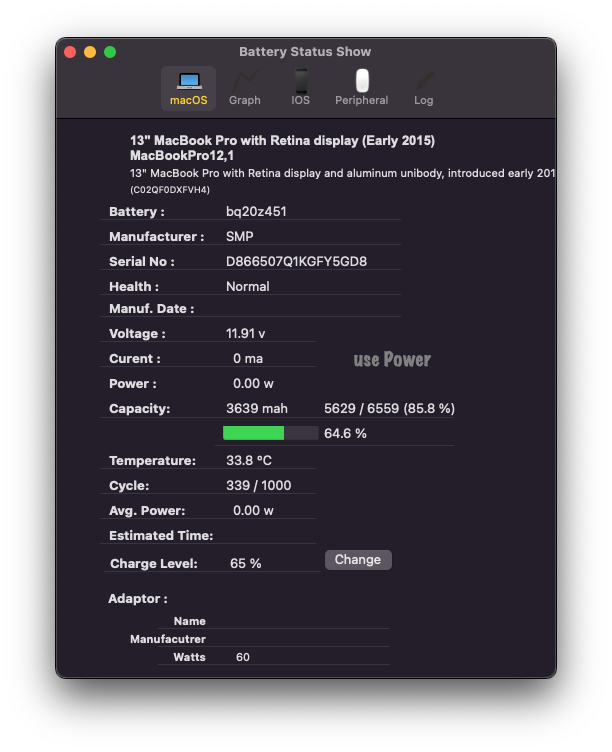
Here you can see that my charging is limited to 64.6% maximum. After this the power of MacBook switches directly to the charging adaptor.
Step 6: To change the charge level you just have to click on the Change button near the Charge level option and set the percentage you wanted the battery to stop charging.
3. Enable Optimized charging on newer MacBooks.
Recent MacBook laptops come with Optimized charging option which will improve your battery life by not charging fast or fully.
To limit the battery charge percentage on a MacBook, you can follow these steps:
Step 1: Open System Preferences by clicking on the Apple icon in the top left corner of your screen and selecting “System Preferences.”
Step 2: Click on “Battery icon” in the System Preferences menu.
Step 3: In the Battery window, you will see the optimized battery charging option which will stop charging after 80% until you wanted it by learning from your daily usage patterns.
Step 4: To enable it, Click on the checkbox next to “Optimized Battery Charging”.
Step 5: That’s it, your MacBook won’t charge above the 80% battery charge limit unless you decide to use the MacBook on battery power.
I hope you were able to setup max charge rate on your MacBook to save battery life with the help of this tutorial. Do let us know if you have any other questions in the comments section below.

