So you are using Windows 7 but would like to go back to the design of Windows XP. You are not alone there are many windows users who wanted to have a Windows XP like theme on their Windows 7 computer without downgrading to Windows XP Operating System.
For this, we have to download XP styled theme skins and apply them on your Windows 7 computer. Let’s learn how to get the Windows XP look.
How to Install Windows XP Theme on Windows 7
- First, you have to download the UxStyle software on your Windows 7 Computer.
- Download this XP based theme named UXStyle using this link https://uxstyle.com/builds/UxStyle_Core_jul13_bits.zip
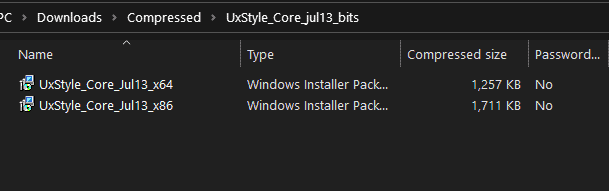
- After downloading the zip file extract it and open the UxStyle_Core folder.
- Then you have to find out which version of Windows 7 you are running.
- Go to Start > Settings > Control Panel > System option and find out whether you have the 64-bit version or 32-bit version.
- Run the UxStyle_Core_Jul13_x64.exe file if you are using a 64bit version of Windows 7. If not then run the x86 version named UxStyle_Core_Jul13_x86.exe.
- After installing the UxStyle Theme Patcher on your Windows 7 computer you have to download the XP theme. Download the one which you like below.
- Download the Windows 7 XP Luna Theme or the Download the Windows 7 XP Royale Blue Theme.
- Now extract the theme files into the C:\Windows\Resources\Themes directory if C is your driver where Windows 7 is installed or replace C with the correct drive.
- That’s it you should be able to see the Windows XP theme applied on your Windows 7 computer.
Hope you were able to make your Windows 7 look like Windows XP. You can also do this in Windows 10 and make Windows 10 look like XP.
Do let us know your comments below.

He is the founder of howtodoninja.com and is an experienced tech writer and a cybersecurity enthusiast with a passion for exploring the latest technological advancements. He has 10 years of experience in writing comprehensive how-to guides, tutorials, and reviews on software, hardware, and internet services. With an interest in computer security, he strives to educate users by writing content on how to use technology, and how to also protect their smart devices and personal data from cyber threats. He currently uses a Windows computer, and a Macbook Pro, and tests hundreds of Android phones for writing his reviews and guides.